Working with Text Object
Home > Text Object
All our webpages are created with Text object. Select Text object tool
and drag a rectangle in the workspace to enter the text, double-click to finish.
You can insert image, object from the library, symbols, radio and check buttons. It is quick and easy to change the font with the drop down font list
. Set the default font and size for the current workspace when no object is selected. Text object created afterward will use the
changed font. Use Preference/Favorite Fonts to set up your font list. Select the object to change the object font, size, color. In edit mode, drag to select
word/words to change font, size, color. The right Text Edit Tool Bar provides easy one button access to often use functions. Clip to change and clip again to
undo. Or click the Undo
button to undo the previous actions. Double-click to edit. Use Preference/Favorite Fonts to open the Select Favorite Fonts
dialog box to set up your own list instead of the default long list of fonts.
In this webpage, we have used text objects, insert images, indent, number bulleted, image on the text, text objects on text object. PageFocus webpages use
text object and image objects extensively. The easy placement of different type of objects provides great flexibility in designing the page. WYSIWYG. See
Tabs
In text edit mode, tabs shown on the ruler can be easily changed, removed, or added.
1.
Select Text/Tab Spacing to change the spacing value. The default value is 0.5 inch.
2.
Drag a tab marker and move it to the desired location on the ruler.
3.
To add a new tab, press down on the Reset button
at the beginning of the ruler, drag a tab to the desired location on the ruler.
4.
To remove a tab, drag the tab over the beginning
or the end
of the tab set.
Indent
In text edit mode, use the right Edit Tool bar to select Indent After/Hanging Indent/Full Indent/ Remove Indent, or select from Text/Paragraph menu to do
text indent. Indent After indents the remaining text of the current paragraph (from the current cursor location) to the next tab position. You can also use F2
to do "indent after". Hanging Indent indents the text of the paragraph to the next tab position starting next lie. Full Indent indents the text of the
paragraph (or the selected paragraphs) to the next tab position. Use Remove Indent to remove indent in the paragraph or click the Undo
button to
undo the previous actions.
Bulleted
In Text edit mode, click the Bulleted by Symbol, Number, ABC or abc tool buttons in the right Edit Tool Bar to list items in text. Enter the text and the
selected bullet type will be added as you enter text in each line. Click
to turn on the bulleted text, to turn it off just click on it again.
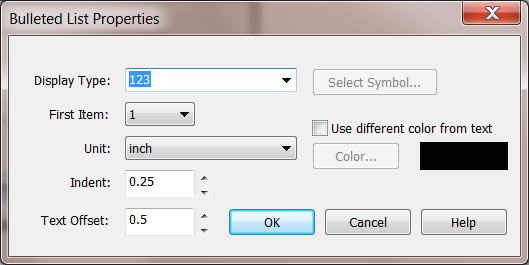
To make change of the selected bullet type, select Bulleted List Properties
to open the dialog box and change the Display Type, First Item to start with
(applied to Number, ABC and abc), indent/text offset distance or color of the bullet.
Insert
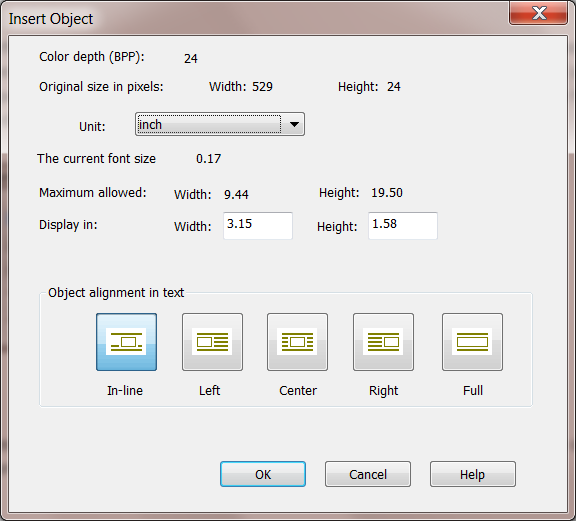
Images, symbols or drawing objects can be inserted into a text object. Copy or cut the object to the clipboard, use Ctrl +V keys or Paste button to insert it
after the current cursor location in the text. The Insert Object dialog box opens for you to select the object placement in the text. You can also change the
display size. The image/object always retains the original aspect ratio. Select Insert Symbol
in right Edit Tool Bar to add a symbol (or use Text/Insert
Symbol menu or F9 key). Select Insert/Display Image
to insert or edit the image. Select Text/Date and Time menu to insert current Date/Time.
Multi-Column
Curved Text
Select a text object and use the Text Flow Tool
in the Right Edit Tool Bar to make a curved text. Select Flow text to curve, drag the nodes on the curve
line to the desired curve. Text will curved accordingly.
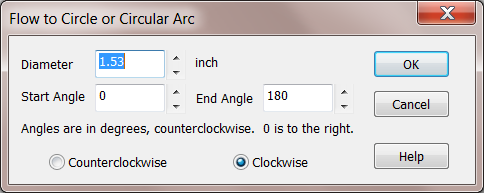
Select Flow text to Arc or Circle to open the Curve Text dialog box to set the parameters. The Text will curve as the parameters are entered.
Select Flow text to line nodes, move the node one by one to make the desired curve.
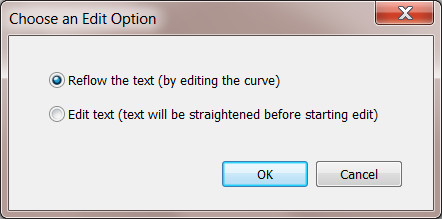
You can easily edit the text or the curve by double-click the curved text to open the Choose an Edit Option dialog box.
You can curve a text object to a line object (Bezier curve or arc ), drag to cover both objects and select Flow text to curve. The text will be automatically
curved along the line object. You can convert any other line objects to Bezier curve using the To Bezier
in the right Edit Tool Bar first, then use the
chain/group to curve a text. Select Floating Tool Bar in the Text Flow Tool to keep all menu items on screen for easy access. To Edit, ungroup first and edit
the curved text or the line. Drag to cover both objects and select Flow text to curve again.
Vertical Text
To create Vertical Text which is a traditional way of writing in some Asian countries, select Vertical Text Tool
in More Objects and choose a Vertical
font which starts with @. Drag the text frame and type. Text will flow from right to left. If you use vertical text frequently, you can move the Vertical Text
Tool from the More Objects Tool Box to the Object Tool Bar using the Preference/Options/Operation menu.
3D Text
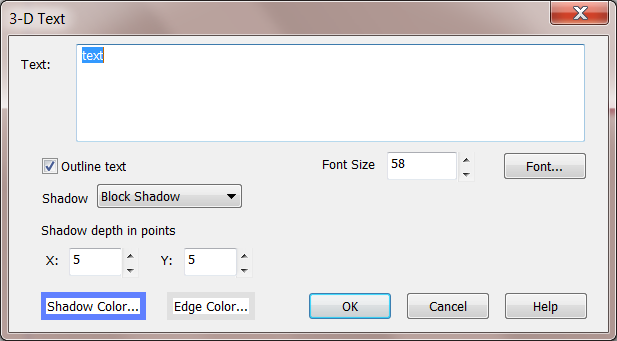
Use 3D Text
in the More Objects to create a text object with shadow. Enter the text, check if text outline is desired; select shadow type, depth and color;
Edge Color; choose Font and size. Use Hollow, Fill or Gradient to color the text.
3D text object is a vector object and can be enlarged without loosing resolution. You can convert it into a bitmap object. For some printer that doesn't have
clipping capability, the 3D text will not print properly. You can convert it to bitmap object before printing.
To convert it to bitmap, select Object/Make Bitmap from Object and select Without Shadow, a bitmap image of the text will be created and placed in the
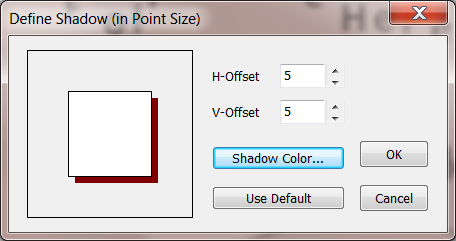
upper left corner of the page. Select With Shadow to open the Define Shadow box to add another layer of shadow. Select OK, a bitmap image with shadow
will be created and placed in the upper left corner of the page.
Text with Shadow
To add shadow to a text object, use the Object/Make Bitmap from Object/With Shadow to open the Define Shadow dialog box to add a shadow to the text
and convert it to a bitmap image. Double-click on the image to open the Image Properties dialog box. Check "Draw with alpha channel" to get a
transparent text. Or right-click and select Set Opaque Color/Select with a Pointer, point to the orange text color.
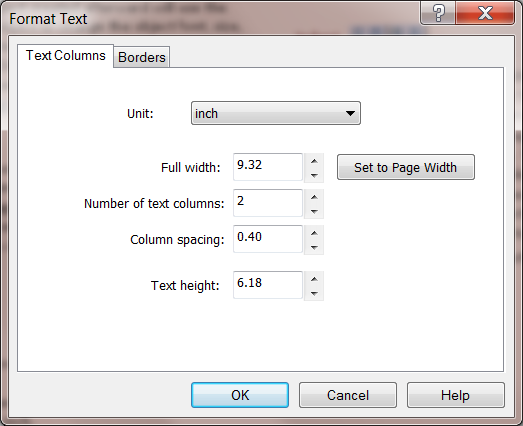


Select a Text object and choose Text/Multi-Column Text Format to open
the Format Text dialog box. Enter desired Number of text columns and
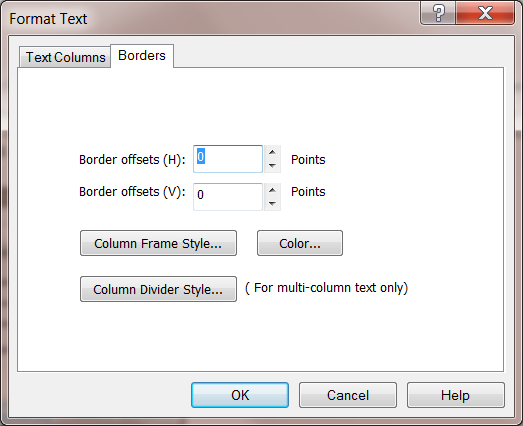
Column spacing. Choose the Borders tab to change the style and colors.
Or in Text Edit mode, select the Text Columns Tool
in the Right Edit
Tool Bar to open the dialog box. The text will be formatted to multi-
column. To quickly adjust the size, just drag the boundary markers. The
column width and height will be adjusted accordingly.

Blue
Green
Red
Purple
Orange
1.
Blue
2.
Green
3.
Red
4.
Purple
5.
Orange
A.
Blue
B.
Green
C.
Red
D.
Purple
E.
Orange
a.
Blue
b.
Green
c.
Red
d.
Purple
e.
Orange


Creative Stars, Inc.
© 2015 Creative Stars


Gradient
Hollow
Solid


( Check Draw with alpha channel )
( Set Opaque Color )
Make Bitmap With Shadow
text